Python Flask from Zero, Part 1: Structure, Factory, Packaging
Flask is a popular micro-framework written in Python. It has a very small core and is very easy to extend. There are barely any restrictions or fixed structures in Flask, which also makes it very easy to mess things up. In this tutorial series, I will try to demonstrate how to build a Flask RESTful application from scratch.
There are tools such as cookiecutter-flask-restful to quick-start a Flask application. However, having worked on several large Flask projects over the last couple of years, I think the best way to learn Flask application development is to start from scratch. The main goal of this tutorial series is to guide the reader through every step of designing, testing, distributing and deploying a Flask RESTful application. I will include tips on best practices where applicable.
In part 1 of this series, we will focus on:
- Preparing the project directory
- Creating and configuring a flask application
- Adding an endpoint and testing
- Preparing distribution packages and deployment
Where the code lives. The full source is in the flask-restful-tutorial repo, organized one branch per part. This post corresponds to the
part-1branch. Check outpart-1to explore the code shown here.
Add initial files
Alright, let’s start by creating our project’s root directory and call it flask-restful-tutorial — the same name as the Github repository. All our project files will reside within this directory. Let’s quickly create three essential files within this directory:
README.md: A README file. It often serves the purpose of an introductory page for the project. We should include developer instructions in this file. Here’s an example README file.LICENSE: A license file. Typically this will contain copyright notices for our project. For this exercise, we will simply start with a MIT license. https://choosealicense.com is quite helpful for finding the correct license..gitignore: A gitignore file. We do not want everything from our project directory to end up in the version control tree. Here is an example gitignore file.
At this point, our project directory will look like this:
1
2
3
4
flask-restful-tutorial
├── .gitignore
├── LICENSE
└── README.md
Initialize Git
Now we can git init and add our favorite remote origin. Let’s add our first commit:
1
2
3
4
5
6
git init
git remote add origin <origin_url>
git add . --all
git commit -am "Initial commit"
git branch -M main
git push -u origin main
Initialize virtualenv
As a server application, we are unlikely to support many different Python versions or platforms, though we can always revisit the build specification later. Let’s create our virtual environment with Python 3.8:
1
2
3
4
python3.8 -m venv venv
source venv/bin/activate
pip install --upgrade pip setuptools
pip install build
We install build, the standard PEP 517 build front-end. We deliberately do not install wheel or setuptools-scm into the project venv, build creates an isolated build environment and installs the build-time requirements (declared in pyproject.toml, see below) into it on demand. Installing them into the venv manually is what leads to them drifting out of sync with the interpreter’s bundled setuptools and breaking the build.
Add packaging files
We should be able to create source and binary distribution packages for our project. In order to do so, we have to add a few files, namely, setup.py, setup.cfg and MANIFEST.in at the root of our project.
setup.py is the script setuptools uses to build and package our project. Its setup() call describes the package and its metadata. Learn more about writing setup scripts here. Let’s start with a simple setup.py, and feel free to add or change values in setup() as necessary:
1
2
3
4
5
6
7
8
9
10
11
12
13
14
15
16
17
18
19
20
# -*- coding: utf-8 -*-
from setuptools import find_packages, setup

install_dependencies = [
    "flask",
    "flask-cors",
]

setup(
    name="myapi",
    url="https://github.com/zobayer1/flask-restful-tutorial",
    license="MIT",
    author="Zobayer Hasan",
    use_scm_version=True,
    packages=find_packages(exclude=["docs", "tests", "tests.*"]),
    include_package_data=True,
    zip_safe=True,
    platforms=["posix"],
    install_requires=install_dependencies,
)
setup.cfg simply configures the behavior of the various setup commands for our project. This file is used in conjunction with setup.py file to supply metadata to the setup() function. We won’t need to add much in setup.cfg file:
1
2
[metadata]
license_files = LICENSE
pyproject.toml (build-system section): this file declares which build backend and build-time dependencies to use. A PEP 517 front-end like build reads it, spins up an isolated environment, installs exactly these requirements into it, and builds the package there. So the build no longer depends on whatever happens to be installed in our project venv. Create it at the project root:
1
2
3
[build-system]
requires = ["setuptools>=42", "wheel", "setuptools_scm[toml]>=3.4"]
build-backend = "setuptools.build_meta"
We will expand this file later with configuration for our development tools.
MANIFEST.in is a manifest template file that contains instructions about how to generate the MANIFEST file, which is the exact list of files to include in our source distribution. Let’s start with adding inclusion and exclusion rules for our project:
1
2
3
4
5
6
exclude .pre-commit-config.yaml
exclude .gitignore
include README.md
include .coveragerc
include tox.ini
recursive-include tests *.py
Note that we haven’t created some of these files yet. Don’t worry about these files now, we will be creating them in the next section. At this point, our directory should look like this:
1
2
3
4
5
6
7
8
9
flask-restful-tutorial
├── .gitignore
├── LICENSE
├── MANIFEST.in
├── pyproject.toml
├── README.md
├── setup.cfg
├── setup.py
└── venv
Let’s generate a source and wheel distribution to test that packaging is working as expected:
1
python -m build
A new dist/ directory has been created. Inside it, there will be a .tar.gz file and a .whl file. We can extract the .tar.gz file, and the .whl file can be installed with pip. They are our source package and wheel distribution respectively.
Add pre-commit hooks
Our project does not have any real source code yet. Before we add real code, let’s put some tooling in place, starting with pre-commit hooks. In a large project it is important to keep the codebase consistent, many developers writing in many different styles quickly becomes a problem for shared code.
Pre-commit will run on every commit and make sure our source code is consistent. Learn more about pre-commit. To install pre-commit, simply run:
1
2
pip install pre-commit
pre-commit install
To define our pre-commit hooks, let’s create a file .pre-commit-config.yaml:
1
2
3
4
5
6
7
8
9
10
11
12
13
14
15
16
17
18
19
20
21
repos:
-   repo: https://github.com/pre-commit/pre-commit-hooks
    rev: v3.4.0
    hooks:
    -   id: trailing-whitespace
    -   id: end-of-file-fixer
    -   id: check-yaml
    -   id: check-added-large-files
-   repo: https://github.com/mgedmin/check-manifest
    rev: "0.46"
    hooks:
    -   id: check-manifest
-   repo: https://github.com/psf/black
    rev: 24.8.0
    hooks:
    -   id: black
-   repo: https://github.com/pycqa/isort
    rev: 5.13.2
    hooks:
      - id: isort
        args: ["--profile=black"]
We no longer have to worry much about code styling, black reformats our code to a standard style adopted across the Python community. Learn more at black’s official repository.
Earlier we created a minimal pyproject.toml with just the [build-system] table. This file also lets us keep configuration for other tools in one convenient place. Append the following to the pyproject.toml file:
1
2
3
4
5
6
7
8
9
10
11
12
13
14
15
16
[tool.black]
line-length = 120
include = '\.pyi?$'
exclude = '''
/(
    \.eggs
  | \.git
  | \.pytest_cache
  | \.tox
  | \.venv
  | venv
  | scripts
  | build
  | dist
)/
'''
pre-commit will handle installing all of the hooks on its own. Simply run the following:
1
2
3
git add . --all
pre-commit autoupdate
pre-commit run --all-files
Note that it is fairly common for pre-commit to fail as it fixes the files. Simply stage the changes and run pre-commit run again. It should succeed.
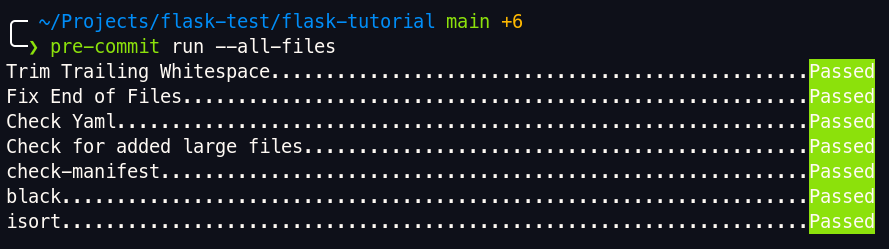 A clean
 pre-commit run once the auto-fixed files are staged.
In practice you rarely run pre-commit by hand. When you commit, it runs automatically and may fail because it reformatted some files, just review the changes, stage them, and commit again. Most IDE Git integrations surface this for you.
Add a test framework
First, let’s create our tests package. We will add the application package myapi in the next section, when we build the app. A python package is simply a directory with an __init__.py file:
1
2
mkdir tests
touch tests/__init__.py
We will use tox and pytest for testing this project, and coverage to generate code coverage reports. Rather than installing these ad-hoc, let’s declare them as a dev dependency group in setup.cfg so they are recorded with the project:
1
2
3
4
5
6
7
8
[options.extras_require]
dev =
    codecov
    flake8
    pytest
    pytest-cov
    python-dotenv
    tox
Now install the project in editable mode along with its dev dependencies:
1
pip install -e '.[dev]'
We will need a tox.ini file to configure our test environments. For now, we will add Python 3.8, but other python environments can be easily added in a similar fashion.
1
2
3
4
5
6
7
8
9
10
11
12
13
14
15
[tox]
envlist =
    py38

[pytest]
filterwarnings =
    error::DeprecationWarning
    error::PendingDeprecationWarning

[testenv]
passenv = USERNAME
commands = py.test --cov myapi {posargs} --cov-report term-missing
deps =
    pytest
    pytest-cov
Let’s add a .coveragerc file to configure code coverage:
1
2
3
4
5
6
7
8
9
10
11
[run]
omit =
    myapi/manage.py
    myapi/version.py
    myapi/wsgi.py

[report]
exclude_lines =
    pragma: no cover
    def __repr__
    def __del__
Our test harness is now configured. There is nothing to test yet, so we will run it once we have some application code and tests in place.
At this point, our project directory should include these (not including gitignored files and directories):
1
2
3
4
5
6
7
8
9
10
11
12
13
flask-restful-tutorial
├── .coveragerc
├── .gitignore
├── LICENSE
├── MANIFEST.in
├── .pre-commit-config.yaml
├── pyproject.toml
├── README.md
├── setup.cfg
├── setup.py
├── tests
│   └── __init__.py
└── tox.ini
We are now ready to move on to the next section, creating our Flask application.
Create a Flask application
First, let’s create our application package myapi, the same way we created the tests package:
1
2
mkdir myapi
touch myapi/__init__.py
Now we will create a few files that define our Flask application.
Behavior of a Flask application can be controlled by a number of configuration parameters. A common practice is to load these configurations from a file or a python object instead of manually updating Flask’s app.config dictionary. A lot of example applications tend to create several different configuration classes in config.py file for various environments such as development, production and testing. But this is not necessary, because a Flask application only runs with one environment configuration, which means we would be creating classes that are never used. A better approach is to use config.py file as a set of default configurations, or a way of loading custom environment variables into the application. Later we will see how we can use instance specific configurations to load configurations for different environments.
1
2
3
4
5
# -*- coding: utf-8 -*-
import os

ENV = os.getenv("FLASK_ENV", "development")
SECRET_KEY = os.getenv("FLASK_SECRET", "bb9ba2817ef62e261d3adaf90c2727bb").encode("utf-8")
This is going to be our script for creating the actual Flask application. We will enrich this file in future as we add more features to our application.
1
2
3
4
5
6
7
8
9
10
11
12
13
14
15
16
17
18
19
20
21
22
# -*- coding: utf-8 -*-
import os

from flask import Flask
from flask_cors import CORS


def create_app(instance_name, app_name="myapi"):
    app = Flask(app_name, instance_path=os.path.join(os.getcwd(), "instance"), instance_relative_config=True)
    app.config.from_object("myapi.config")
    app.config.from_pyfile(f"{instance_name}/application.cfg", silent=True)
    initialize_extensions(app)
    initialize_blueprints(app)
    return app


def initialize_extensions(app):
    CORS(app)


def initialize_blueprints(app):
    pass
We will talk about instance_relative_config in a later section.
A simple script exposing an app object which can be used as FLASK_APP parameter.
1
2
3
4
5
6
# -*- coding: utf-8 -*-
import os

from myapi.app import create_app

app = create_app(os.getenv("FLASK_ENV", "development"))
While this script isn’t really necessary, it allows us to add custom scripts to our application. This can come in handy if we want to add some CLI routines, for example, application initialization, database migration, dependency check, etc. We will use click for this.
Here’s our initial myapi/manage.py file:
1
2
3
4
5
6
7
8
9
10
11
12
13
14
15
16
17
18
19
20
21
# -*- coding: utf-8 -*-
import os

import click
from flask.cli import FlaskGroup

from myapi.app import create_app


def create_cli_app():
    return create_app(os.getenv("FLASK_ENV", "development"))


@click.group(cls=FlaskGroup, create_app=create_cli_app)
def cli():
    """Management interface for myapi"""
    pass


if __name__ == "__main__":
    cli()
Update install_dependencies in setup.py to include click:
1
2
3
4
5
install_dependencies = [
    "click",
    "flask",
    "flask-cors",
]
Also, let’s add entry_points argument to setup() in setup.py:
1
2
3
4
5
6
7
8
9
setup(
    ...
    entry_points={
        "console_scripts": [
            "myapi = myapi.manage:cli",
        ],
    },
    ...
)
.flaskenv:
Our Flask application can take advantage of the python-dotenv library. We can add environment variables that we need frequently in a .env/.flaskenv file which will be automatically picked up by the application when we are running a development server. Let’s add a few environment variables:
1
2
3
4
#!/usr/bin/env bash
export FLASK_ENV=development
export FLASK_APP=myapi.wsgi:app
export FLASK_SECRET=bb9ba2817ef62e261d3adaf90c2727bb
Note that this file should be excluded from git. This file will not be used when we are testing with tox or running a production server with wsgi tools such as gunicorn.
Let’s test what we’ve done so far. Now that we’ve added the myapi entry point, reinstall the application in editable mode so the console script gets registered:
1
pip install -e .
Try cli commands:
1
myapi --help
We should see output like this:
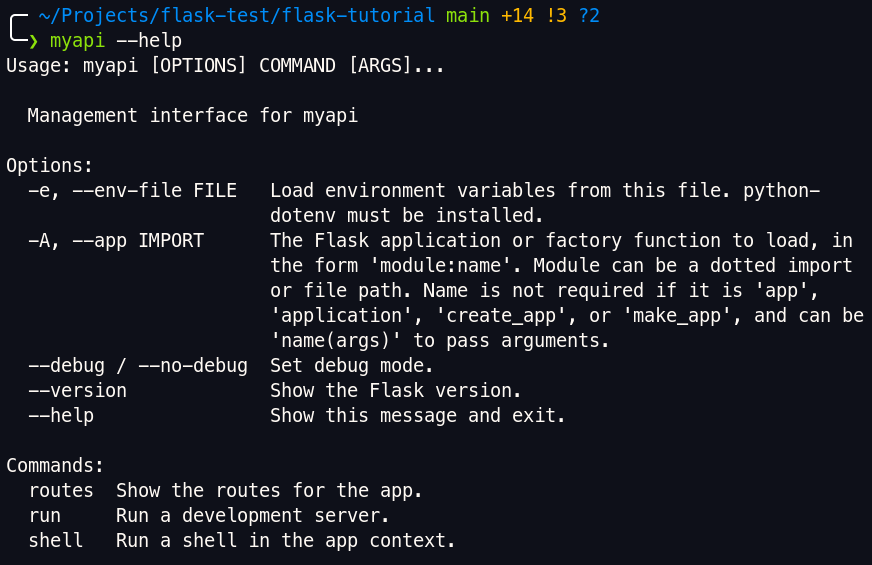 The help menu output from
 myapi --help after installing the app
In future, we may even add some more commands. Feel free to play around with these commands. Let’s start a development server, we can do this by running
1
2
3
flask run -h 0.0.0.0 -p 5000
or
myapi run -h 0.0.0.0 -p 5000
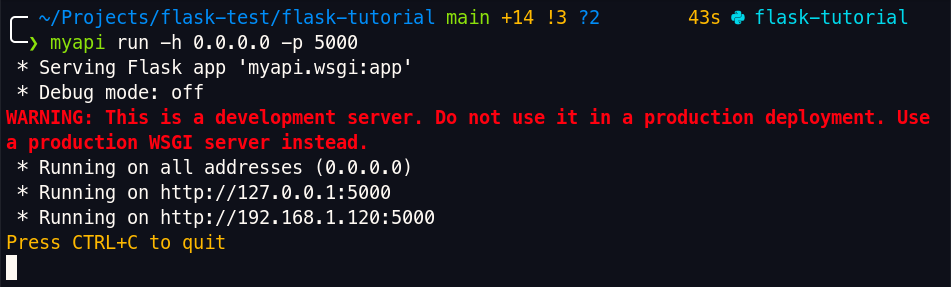 Starting a development server with
 myapi run on port 5000
Press CTRL+C to exit from the development server.
Add some tests
Now that we have our application ready, it’s time to add our tests. Let’s start by creating a tests/conftest.py file which will hold our shared pytest fixtures.
1
2
3
4
5
6
7
8
9
10
11
12
13
14
15
16
17
18
19
20
21
22
# -*- coding: utf-8 -*-
import pytest

from myapi.app import create_app


@pytest.fixture(scope="module")
def app():
    """A flask app with testing configurations"""
    return create_app("testing")


@pytest.fixture(scope="module")
def client(app):
    """An HTTP test client to test api endpoints"""
    return app.test_client()


@pytest.fixture(scope="module")
def runner(app):
    """A CLI test client to test shell commands"""
    return app.test_cli_runner()
Next, we will add some actual tests, let’s create a tests/test_config.py with following tests:
1
2
3
4
5
6
7
8
9
10
11
12
13
14
# -*- coding: utf-8 -*-
from importlib.metadata import version


def test_env(app):
    """Test fails if app was not initialized with testing configurations"""
    assert app.config["ENV"] == "testing"
    assert app.testing


def test_application_version(app):
    """Test fails if importlib metadata could not be loaded from metadata"""
    assert app.name == "myapi"
    assert len(version(app.name)) > 0
Now try to run these tests using pytest -s in the terminal. They will fail. Why? Because we haven’t defined a testing environment yet. That leads us to the next section: configuring our Flask application with instance-relative files.
Configure our Flask application
Let’s first create an instance directory at the root of our project. This directory will contain the actual configuration values for different environments. Note that we should keep this directory out of git so that sensitive information doesn’t get exposed.
Let’s create a few different configuration files:
instance/development/application.cfg:
1
2
3
ENV = "development"
DEBUG = True
TESTING = False
instance/production/application.cfg:
1
2
3
ENV = "production"
DEBUG = False
TESTING = False
instance/testing/application.cfg:
1
2
3
ENV = "testing"
DEBUG = False
TESTING = True
In the future, we will add much more to these files, but for now these are sufficient. Now, let’s try to run those tests again:
1
tox --recreate -e py38
The --recreate flag rebuilds the tox environment (needed whenever a dependency changes), and -e py38 targets a specific environment. Code style is already enforced by black and isort through pre-commit, so there is no separate flake8 lint environment.
The output should look something like:
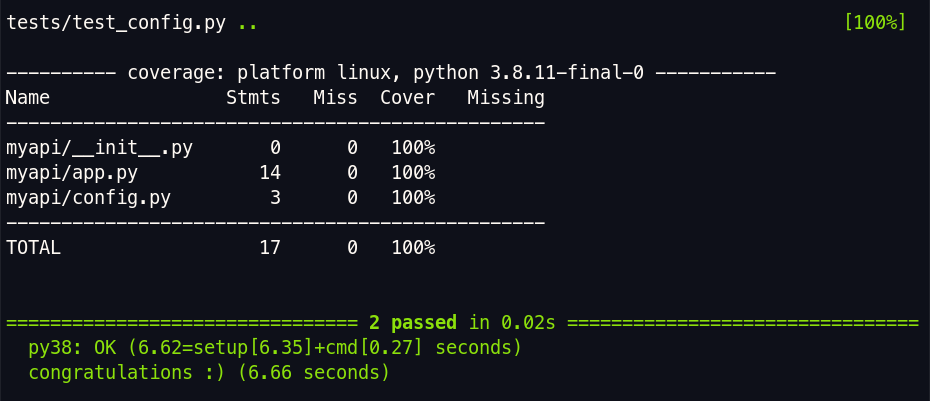 The
The py38 environment passing once the instance configurations are in place.
This is great!! Now we are ready to add our first REST endpoint.
Add our first endpoint
We will be adding a simple health-check endpoint in our application. Endpoints like this are useful for a production environment as our load balancers can poll these endpoints to determine server states. First, let’s add a test which will try to load /myapi/v1/health/status. Create a test_health package inside tests and add tests/test_health/test_status.py file:
1
2
3
4
5
6
7
8
9
# -*- coding: utf-8 -*-
import json


def test_server_status_returns_success(client):
    """Test fails if /myapi/v1/health/status does not return success"""
    response = client.get("/myapi/v1/health/status")
    assert response.status_code == 200
    assert json.loads(response.data).get("status") == "running"
Let’s run tests with pytest -s and this test should fail.
Now let’s add the blueprint that exposes /myapi/v1/health/status. We will keep our HTTP endpoints under a versioned package, so create myapi/endpoints/v1/ — each level is a python package with its own __init__.py file. Add the health endpoint in myapi/endpoints/v1/health.py:
1
2
3
4
5
6
7
8
9
10
11
12
# -*- coding: utf-8 -*-
from importlib.metadata import version

from flask import Blueprint
from flask import current_app as app

health_blueprint = Blueprint("health", __name__)


@health_blueprint.route("/status", methods=["GET"])
def status():
    return {"server": f"{app.name} v{version(app.name)}", "status": "running"}, 200
We are using plain Flask here: a Blueprint to group related routes, and a simple view function for the /status route. Returning a dict from a view lets Flask serialize it into a JSON response automatically, so a straightforward endpoint like this needs no extra REST framework.
Finally, we need to register this blueprint in our app. This is done with the app.register_blueprint method in the app.py file (don’t forget to import health_blueprint from myapi.endpoints.v1.health):
1
2
3
4
from myapi.endpoints.v1.health import health_blueprint

def initialize_blueprints(app):
    app.register_blueprint(health_blueprint, url_prefix="/myapi/v1/health")
Note that we are returning the version of our app. This version is derived by setuptools_scm, which we already enabled with use_scm_version — here we additionally have it write the resolved version into our package as a file. Append the following to your pyproject.toml file:
1
2
3
4
5
6
7
[tool.setuptools_scm]
write_to = "myapi/version.py"
write_to_template = "# -*- coding: utf-8 -*-\n\n__version__ = '{version}'\n"
version_scheme = "release-branch-semver"

[tool.check-manifest]
ignore = ["myapi/version.py"]
This allows us to find the package version automatically from git tags and commits. We will be using semantic versioning for tagging in this project. The write_to setting tells the build system to generate myapi/version.py with the resolved version string every time the package is built, whenever you run python -m build or pip install -e ., setuptools_scm (re)writes this file. Because it is regenerated on every build, myapi/version.py should not be edited manually or tracked by VCS. Since this generated file still lands in the source distribution while staying out of git, the [tool.check-manifest] entry tells the check-manifest hook to ignore it, otherwise that hook would fail.
Now, let’s try to run the tests again.
1
tox -e py38
We should see success output:
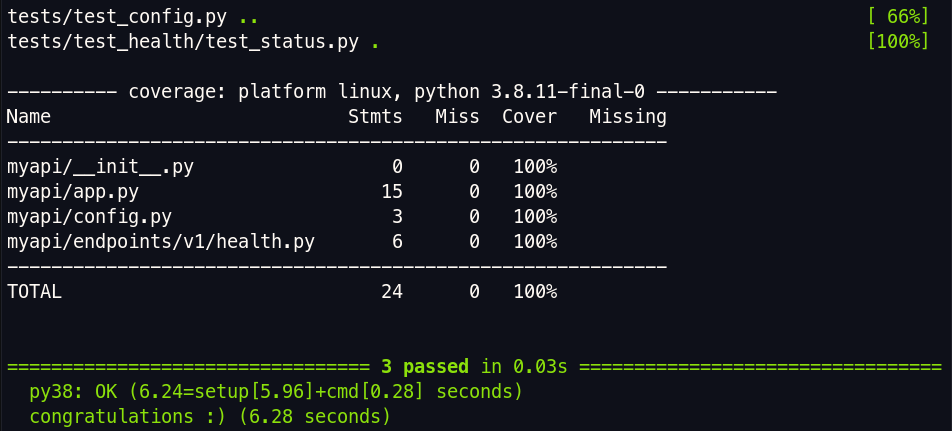 The
The py38 environment passing once the health endpoint is in place.
Fantastic!!! Now we are ready to explore the final segments of part 1, distributing and running the application.
Run the application server
To start a development server, simply run:
1
flask run -h 0.0.0.0 -p 5000
If you navigate to http://localhost:5000/myapi/v1/health/status, you should be able to get a JSON response similar to:
1
2
3
4
{
    "server": "myapi v0.1.0.dev1+gf5de446ab.d20260719",
    "status": "running"
}
Or, you can run curl:

curl output from http://localhost:5000/myapi/v1/health/status
Note that your version output will vary, which is perfectly fine.
However, we are not going to run a server with flask run in production, instead we will use gunicorn, a WSGI server, to run our application.
Before packaging for deployment, let’s commit our work and tag this release. Since setuptools_scm derives the version from git, tagging gives our build a clean 0.1.0 instead of a development version:
1
2
3
git add . --all
git commit -m "Complete part 1"
git tag -a v0.1.0 -m "Release 0.1.0"
Now create the wheel by running:
1
python -m build --wheel
This should create a .whl file inside dist/ directory. Copy this file to your chosen location, along with your instance/ directory. The contents should look like:
1
2
3
4
5
6
7
8
├── myapi-0.1.0-py3-none-any.whl
└── instance
    ├── development
    │   └── application.cfg
    ├── production
    │   └── application.cfg
    └── testing
        └── application.cfg
Note that you only need the subfolder for your target environment. We will use the production environment here.
Next step, set your environment variables in the terminal:
1
2
3
export FLASK_ENV=production
export FLASK_APP=myapi.wsgi:app
export FLASK_SECRET=bb9ba2817ef62e261d3adaf90c2727bb
Optionally, you can add the environment variables in a .env/.flaskenv file and export them with source .env. However, keeping secrets in a permanent file is risky, never commit these files to VCS.
Create a virtualenv and install the application:
1
2
3
4
5
python38 -m venv venv
source venv/bin/activate
pip install --upgrade pip
pip install myapi-0.1.0-py3-none-any.whl
pip install gunicorn
Now that the dependencies are resolved, let’s run the application server with gunicorn:
1
gunicorn -b 0.0.0.0:5000 -w 4 myapi.wsgi:app
Navigate to http://localhost:5000/myapi/v1/health/status and you should see the same response, this time reporting a clean myapi v0.1.0, since we built the wheel from the tagged commit.
This is it! Let’s recap what we have done so far:
- Initialized the git repository and pre-commit tooling.
- Prepared the build system and set up a test framework.
- Added our first endpoint and ran end-to-end tests.
In part 2, we will make the project more robust by pinning dependencies, reorganizing the source for readability, and adding a logging framework and Swagger (via apispec) for easier API testing and documentation.
Continue to Part 2 →